So, you want to lure your enemies into deadly traps while providing a sustained, ranged DPS? The Huntress is your best pick!
This guide will cover both the solo and multiplayer aspects of a Huntress.
Basics[]
A good Huntress has to know what she can (or can't!) do.
Traps[]
The Huntress doesn't have any tower or blockade. Instead, she uses traps.
![]() Proximity Mine Trap (40MP, 3DU) : Crude, but deadly. 680 PHYSICAL base damage. Can also be used as a poor man's spike trap.
Proximity Mine Trap (40MP, 3DU) : Crude, but deadly. 680 PHYSICAL base damage. Can also be used as a poor man's spike trap.
![]() Gas Trap (30MP, 2DU) : This trap will unleash a coughing gas as soon as a mob trigger it. The gas holds several seconds, so other mobs can be stopped too! It is poison-based, so beware of poison-resistant enemies as they will trigger it, but won't be stopped.
Gas Trap (30MP, 2DU) : This trap will unleash a coughing gas as soon as a mob trigger it. The gas holds several seconds, so other mobs can be stopped too! It is poison-based, so beware of poison-resistant enemies as they will trigger it, but won't be stopped.
![]() Inferno Trap (60MP, 3DU) : This trap will literally unleash hell upon the poor guy that steps on it. The fire will hold several seconds, so try to pack the mobs before! It inflicts fire damage (of course...), so beware of fire-resistant enemies as they will trigger it, but won't take any damage.
Inferno Trap (60MP, 3DU) : This trap will literally unleash hell upon the poor guy that steps on it. The fire will hold several seconds, so try to pack the mobs before! It inflicts fire damage (of course...), so beware of fire-resistant enemies as they will trigger it, but won't take any damage.
![]() Darkness Trap (70MP, 5DU) : This trap will liberate fumes that blind the enemies, making them lose their target. Very useful for group situations, as this will allow your allies to freely repair or let their towers/blockades live (no target = no damage!)
Darkness Trap (70MP, 5DU) : This trap will liberate fumes that blind the enemies, making them lose their target. Very useful for group situations, as this will allow your allies to freely repair or let their towers/blockades live (no target = no damage!)
![]() Ethereal Spike Trap (80MP, 4DU) : This trap will inflict massive damage upon a single enemy (Be careful! He won't tell the difference between a goblin and an ogre!). Best used on bosses and mini-bosses, when you have to make your last stand at the crystal(s).
Ethereal Spike Trap (80MP, 4DU) : This trap will inflict massive damage upon a single enemy (Be careful! He won't tell the difference between a goblin and an ogre!). Best used on bosses and mini-bosses, when you have to make your last stand at the crystal(s).
BE CAREFUL! If you "connect" several traps of the same type, you will trigger a chain reaction. By connect, I mean the effective range of the trap, not the activation range.
Weapons[]
A huntress can wield bows/crossbows and guns. Personal preference : Shotguns (and bone crossbows, if I'm right...), as they "pierce" through any non-large enemy to damage another one behind. But don't hesitate to get "normal" bows/guns if you can have a real boost to your DPS. Just follow these recommendations.
Recommended stats[]
Damage, of course. Elemental weapons can do wonders, but if you intend to do that, get electric weapons to avoid immunity problems (Fire is already taken by your fire trap, Poison is already taken by your gas trap...Sure, the spike trap does electric damage, but it's only used for bosses/mini-bosses, which doesn't have a resistance). Be careful, Piercing Shots are based on the NEUTRAL weapon damage.
Rate of fire. A good RoF will allow you to boost your DPS. Try to get 3-4 RoF if you can spend some mana to get your weapon to LvL 4+. 1 is a no-no, 2 is average.
Character stats. Boosting your own stats, even on a weapon, is a good way to improve your character (especially if you get your hands on this delicious Character Damage stat)
Other stats[]
Clip size. Not very useful if you have more than ~20 ammo.
Reload time. Can be useful, as you have way less downtime in your DPS. If you have a negative reload time, it can severely hinder your DPS, so plan on returning to +0 (or better!) as soon as possible.
Projectile speed. Don't bother with that. If you get used to your weapon, you'll know WHEN your shots will land. The only drawback could be versus Dark Elf Warriors, as they're very mobile.
Gear
Don't bother with resistances. You're not a DPS Squire, you're not supposed to take damage. Instead, focus on character stats. Try to obtain a set bonus (+20% on all pieces when you have all pieces of the same type...Only leather, only mail, only chain, only plate, only pristine).
Character stats
As every hero, you have 8 stats and 2 abilities.
Hero stats
![]() Hero Health increases your Max HP. Spend some points in there if you plan for Insane runs or when you encounter your first dark elf warriors (as they're quite hard to evade and DPS), during the Armory level.
Hero Health increases your Max HP. Spend some points in there if you plan for Insane runs or when you encounter your first dark elf warriors (as they're quite hard to evade and DPS), during the Armory level.
![]() Hero Damage well...increases your weapon damage. A very good stat on multi play (When you can't build traps, you have to rely on your gun/crossbow, right?), and a useful one on solo play (killing ogres and bosses will be easier).
Hero Damage well...increases your weapon damage. A very good stat on multi play (When you can't build traps, you have to rely on your gun/crossbow, right?), and a useful one on solo play (killing ogres and bosses will be easier).
![]() Hero Speed increases your movement speed. The Huntress has a very good base movement speed, so don't bother with that stat when you play in a group. During solo play, it "can" be useful (better map control, as you can switch from one side to another quicker). You can get that stat with gear, though...It doesn't hurt!
Hero Speed increases your movement speed. The Huntress has a very good base movement speed, so don't bother with that stat when you play in a group. During solo play, it "can" be useful (better map control, as you can switch from one side to another quicker). You can get that stat with gear, though...It doesn't hurt!
![]() Hero Casting Rate enhances your capacity to repair, build and promote towers. Can be useful on multi play, as you'll take less time to repair that blockade before taking your weapon to kill everything.
Hero Casting Rate enhances your capacity to repair, build and promote towers. Can be useful on multi play, as you'll take less time to repair that blockade before taking your weapon to kill everything.
Hero Abilities[]
Invisibility allows the Huntress to slip into the shadows. She can't be targeted (except by Dark Elf Warriors), but projectiles directed towards other players or defenses can hit her. It's a cool ability, as you can easily repair your traps behind the enemy lines or laying some on a bunch of blocked enemies, but I think you shouldn't bother spending points in that ability. If you want to do it anyway...Spending points in that ability reduces the upkeep cost of this ability.
Piercing shot, on the other hand, is very useful, especially on Insane runs. Basically, it's a shot that can pierce EVERY enemy in a line, and they can do NOTHING about it (No reduction/immunity!). Base damage is based on your current weapon and each point spent further increases Piercing Shot's damage. It burns some mana though, so only use it if you NEED it (a line of monsters almost at the crystal, or monsters destroyed a defense, so you need to hold ground for your teammates while they rebuild it). But if you feel comfortable, you can burn some MP to speed up the wave (and obtain more points, as there's a bonus based on your combat time)
Trap stats[]
![]() Trap Health increases the longevity of your traps by giving them more activations. Obligatory, even for a DPS build, even if you play in a group. When you think about it, a 10+ gas trap is awesome as you usually won't need to maintain it during a whole wave. If you plan on doing a pure DPS build (to play with teammates), don't bother investing points in Trap Health (you'll better spend them in Piercing Shot, eventually Hero Health and Hero Speed/Casting Speed)
Trap Health increases the longevity of your traps by giving them more activations. Obligatory, even for a DPS build, even if you play in a group. When you think about it, a 10+ gas trap is awesome as you usually won't need to maintain it during a whole wave. If you plan on doing a pure DPS build (to play with teammates), don't bother investing points in Trap Health (you'll better spend them in Piercing Shot, eventually Hero Health and Hero Speed/Casting Speed)
![]() Trap Damage isn't that useful. You already have a very good base damage on your traps (explosive and ethereal spike already one-shot most of the enemies, and you can finish monsters that passed these traps), and Inferno traps are there to be upgraded if you need to use them. Get ~10 points if necessary. Getting bonuses with gear is fine too!
Trap Damage isn't that useful. You already have a very good base damage on your traps (explosive and ethereal spike already one-shot most of the enemies, and you can finish monsters that passed these traps), and Inferno traps are there to be upgraded if you need to use them. Get ~10 points if necessary. Getting bonuses with gear is fine too!
![]() Trap Radius is useful to a certain point. Get about 20-25 points, to fully cover most chokes with a single trap. After, it's useless.
Trap Radius is useful to a certain point. Get about 20-25 points, to fully cover most chokes with a single trap. After, it's useless.
![]() Trap Cooldown is in my opinion useless, but some might find it interesting. You wouldn't need it because enemies usually come in waves, so your traps are reactivated at the right time and traps last long enough to pack and kill them. And if it isn't the case, just build another gas+fire+explosive combo behind, or let your teammates handling that for a few seconds! But when I see Huntresses doing solo runs with 40+ points in this stat, I can see the traps have an almost-instant CD, increasing their uptime, increasing their DPS. Only bother with that stat if you do solo insane runs, and try to get a good part of your Trap CD points with your gear.
Trap Cooldown is in my opinion useless, but some might find it interesting. You wouldn't need it because enemies usually come in waves, so your traps are reactivated at the right time and traps last long enough to pack and kill them. And if it isn't the case, just build another gas+fire+explosive combo behind, or let your teammates handling that for a few seconds! But when I see Huntresses doing solo runs with 40+ points in this stat, I can see the traps have an almost-instant CD, increasing their uptime, increasing their DPS. Only bother with that stat if you do solo insane runs, and try to get a good part of your Trap CD points with your gear.
Solo Play[]
The Huntress can solo on easy/medium difficulties most levels as soon as she unlocks them. Hard/Insane should only be tried after getting a nice gear and/or a sufficient level.
Mechanisms[]
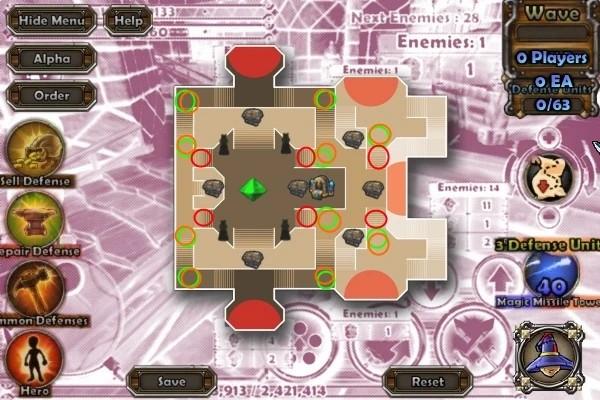
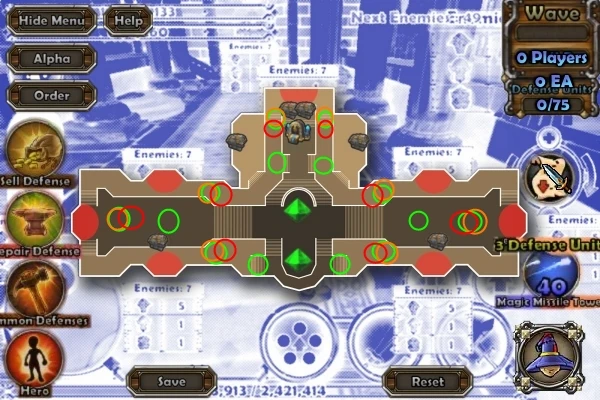
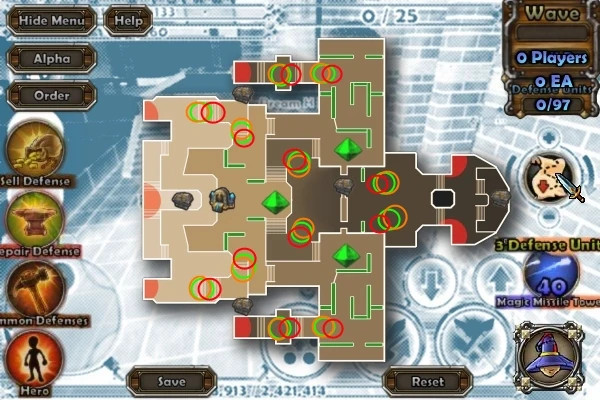
You can't rely on ANY blockade. So, when you solo something, ALWAYS set gas traps on common choke points. This will prevent any non-poison-resistant enemy from rushing towards your crystal. You should (read HAVE TO) build a fire trap at the same place (The fire trap should be in front of the gas trap while being very close to it). An explosive trap can be built behind this combo, to deny any fire (or tough, poison) resistant enemy.
On bosses/mini-bosses, set some explosive/spike traps and lure them into these traps (Shoot at them, "taunt" them by staying close to them). Don't set these traps near the crystal (ogres will rush towards the crystal and ignore you if they're too close), except if the boss is encountered near a crystal.
Ideal spots & Strategy[]
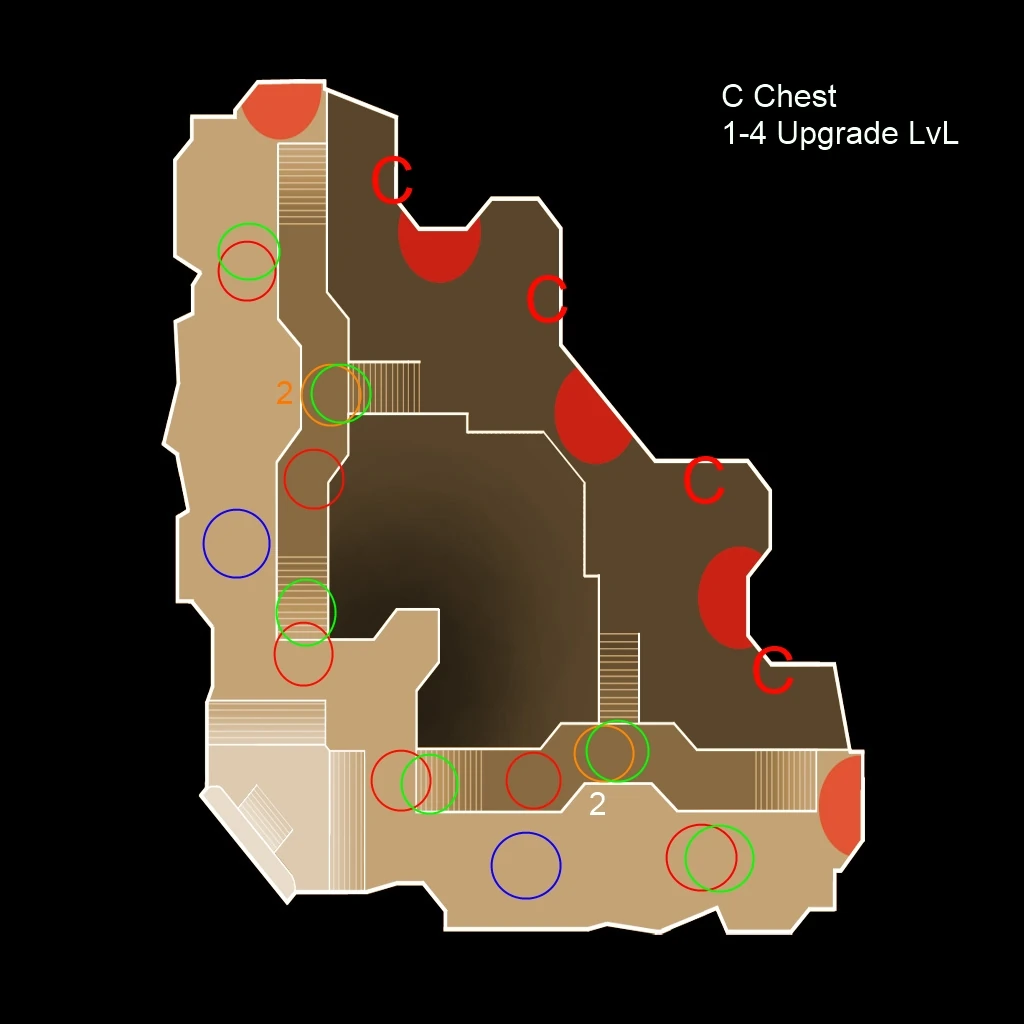
The Deeper Well (Insane)[]

You can do this strategy on Insane, provided you're a Trap Huntress. I think LvL 20+ should be enough. I've personally done this on LvL 30 without any damage to the Core and a lot of spared mana.
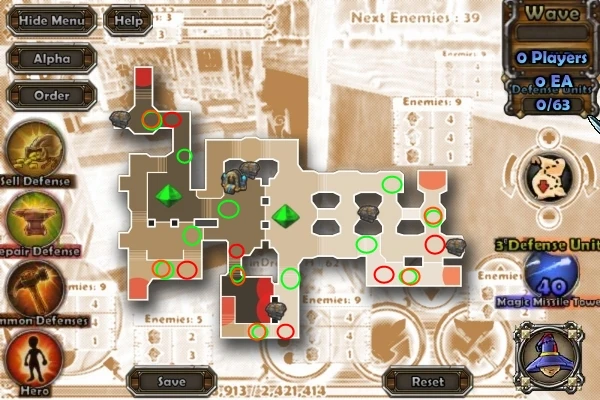
1st Wave : Build gas and explosive on the lower stairs.
2nd Wave : Build fire on the lower stairs and the other gas in the upper stairs.
3rd Wave : Upgrade both fire traps, build the second set of explosives near the crystal and prepare the ground for the 4th wave with a gas + explosive at the flank doors.
4th Wave : Build two ethereal spike traps on the flanks. Upgrade both fire traps. BE CAREFUL! Focus on the flank doors, especially if there's an electricity-resistant orc!
5th Wave : If you're unsure about that, upgrade your fire traps a third time, but you can econ your mana and do some piercing shots on the main waves when they reach the second gas trap. BE CAREFUL! Focus on the flank doors, especially if there's an electricity-resistant orc!
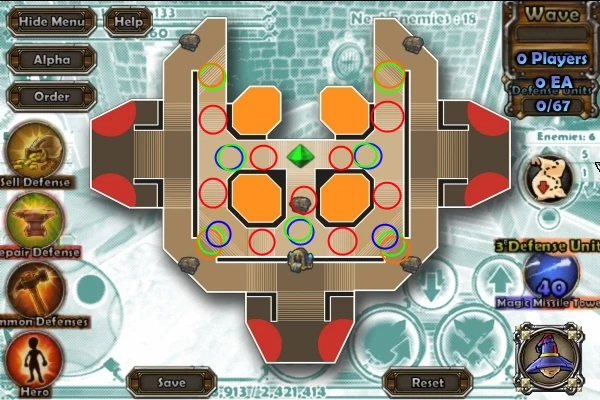
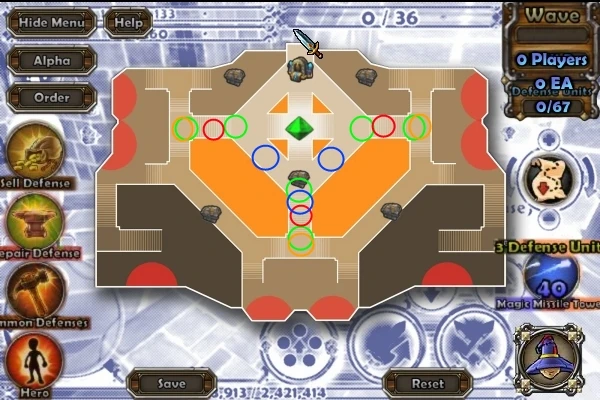
Foundries and Forges (Insane)[]

After several tries, when I was like "HOLY CRAP, HOW CAN I SOLO THIS?!", I figured out a layout. Done as a LvL 32 Trap Huntress.
I'm going to write "Interior" when I want to refer to the last line of defense before the crystal, and "Exterior" when I want to refer to...Well...The first and second line of stairs.
If you can, try to build your next wave's defenses DURING a wave. This will greatly help you, as you don't have much time to prepare for the next wave.
ALWAYS check your map, as any element-resistant or strong mob could pass through your defenses!
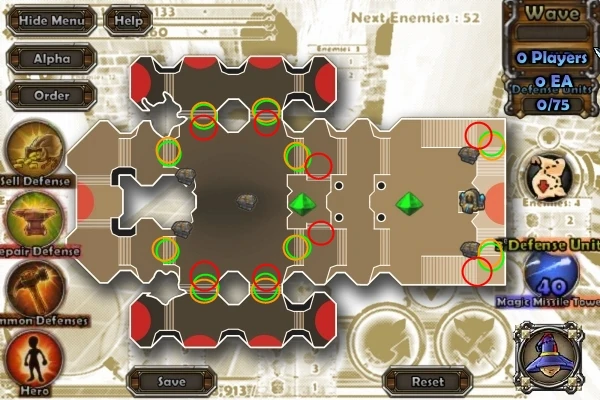
1st Wave : Build gas on the exterior.
2nd Wave : Build fire on the exterior.
3rd Wave : This wave includes orcs in the mix. Build explosive on the exterior.
4th Wave : Begin upgrades on the fire traps. You'll need LvL 2 upgrade ASAP. Build the interior defenses (spike + gas + explosive). Upgrade ALL your explosive traps ASAP.
5th Wave : Finish your upgrades, build spike traps on the exterior, to be ready for the last wave. Kobolds pop on the last two waves and they are very dangerous (on Insane, they can destroy the crystal with 3-4 explosions), so focus them ASAP. 3 Kobolds on this wave.
6th Wave : Don't burn any mana, except if you need to maintain your traps. You'll need 8+ charges on each, to be sure to keep them alive for the wave's duration. Focus the kobolds ASAP (there are 6 Kobolds on this wave). When the ogre pop, FOCUS HIM LIKE THERE'S NO TOMORROW! Spam Piercing shots while spamming normal shots on him, reload, rince & repeat until he's dead! The more points you have in Piercing Shot, the easier it will be! (Done it with 11 pts)
NOTE : It might be possible to do it with LvL 1 upgrade on spike traps instead of spamming piercing shots.
Magus Quarters (Hard)[]

For this one, a LvL 25-30 Huntress should do the trick, as I had a lot of mana to spare as a LvL 40 Huntress. You will encounter red goblins during the last waves and a 30k HP Ogre, meaning it's almost at the same difficulty as Insane Foundries and Forges (almost, because the orcs are still yellow on Hard Magus Quarters).
1st wave : Build your gas traps.
2nd wave : Build fire. Upgrade it to LvL 1 ASAP.
3rd wave : First wyvern wave. Build 2 spikes on the sides (Explosive won't work). Watch out for electricity resistant wyverns and wyverns appearing by two on the same side from this point, as you'll have to focus them down yourself. Complete your defense with explosives.
4th wave : Get an ethereal in the southern stairs. You'll appreciate it for the Ogre. Upgrade explosives to LvL 1, upgrade fire to LvL 2.
5th wave : Continue upgrading if it isn't done already, upgrade your southern spike to LvL 2. Keep your MP, it will help you.
6th wave : Focus down the wyverns and keep shooting at the southern waves. You'll have to make way for the Ogre, as it will help if he triggers the spike trap. To beat him, just spam Piercing Shot with the MP you saved. He should go down before he can even touch the crystal. If there are a few enemies on the crystal during the Ogre encounter, don't eliminate them. You'll have plenty of time to do it after the Ogre!
Alchemical Laboratory (Hard)[]

Done at LvL 44. I think it can be done at LvL 40, provided you have a good weapon and many points in Piercing Shot. Watch out for the elf wizards in the last waves!
This map, like Magus Quarters, needs a good awareness (A poison-resistant orc could pass your defenses, or a little wave can pass while your defenses are on cooldown...), so check at EVERY "downtime" (reloading, just finished a pack,...)
By 1st line, I mean "Close to the creep apparition spots", and by 2nd line I mean "Closer to the crystal".
1st wave : Build your 1st and begin to build the 2nd line of gas.
2nd wave : Finish your 2nd line of gas. Build fire traps at the 1st line. Build fire traps at the 2nd line ASAP.
3rd wave : Build explosive traps at the 2nd line. Begin upgrades, but keep ~100MP if you need to do an urgent Piercing Shot. Priority : Fire 1st line, Fire 2nd line, Explosive 2nd line. Upgrade equally (All of your traps must be LvL1 before going to LvL2)
4th wave : All your traps are placed, just keep upgrading.
5th wave : Same.
6th wave : Same.
BOSS - Demon Lord : This spiked-chin demon has several abilities...
If he brandishes his swords, he'll do a trail of fire towards you. Jump on the side to avoid it until you're okay.

While he's flying, KEEP YOUR DISTANCES! He'll cast fireballs. Watch out, as he can follow your movements, so stand still until he casts his fireball to avoid it with ease.

Keeping your distance is also important, as he can "charge" you, inflicting massive amounts of damage if the attack connects.

To kill it, you should respect these 3 steps :

1) Attack him. When the pylons can be attacked, eliminate them.

2) The boss is stunned! Heal yourself (you're safe after all!) and burst him with Piercing Shots and normal shots!

3) While the pylons aren't activated, keep DPSing the boss. If you feel enemies are too close to the crystal, burst them quickly with some Piercing Shots (keep an eye on the boss!). If you are low on MP, kill some enemies or pass on your traps to recolt a lot of gems!

Be careful, if you're low on trap activations, try to finish the boss quickly. It's possible for the crystal to take some hits, and you can do 2-3 piercing shots if you really need to clean around it...But you will be outnumbered if you don't kill the boss quickly, so don't stick around for too long.
Servants Quarters (Hard)[]

This one is easier than Alchemical Laboratory, even when you have to manage more paths. Done at LvL 45, a few damage done on the crystals, but I finished almost full MP. Might be done in Insane, if you're a bit lucky on the enemies' resistances and check your map at every downtime.
1st Wave : Build 1st lane gas.
2nd Wave : Build 1st lane fire, and begin 1st lane explosive (focus on the spots which have more enemies)
3rd Wave : Finish the 1st lane explosive. Build 2nd lane gas (can give you some time if necessary). Upgrade your fire and explosive traps. Priority : More enemies = Upgraded first.
4th Wave : All your traps are placed, just continue your upgrades.
5th Wave : Same.
Castle Armory (Hard)[]

This one is as easy as Servants Quarters. I'd even say easier, as you have nice lines of sight to shoot. Done at LvL 45, LvL 40 should be enough. Can be done on Insane if you can provide enough DPS on the 1st wave and on the Ogre of the last wave.
This level introduces Elf Warriors. Be careful, they won't trigger any of your traps and will focus you! Try to bring them down quickly. Cast a Piercing Shot if necessary.
1st Wave : Build your 1st line gas. Don't hesitate to burn some MP with Piercing Shots, as you don't have any damaging defense yet.
2nd Wave : Build your fire and explosive.
3rd Wave : Build your 2nd line gas. Upgrade fire and explosive ASAP. Get your first LvL1 and LvL2 upgrades on the main gate (north of the map), but don't forget the others!
4rd Wave : All your traps are placed, continue your upgrades.
5th Wave : Same. A 30k HP Ogre will appear at the main gate. Just focus it, and use your spared MP to cast Piercing Shots.
Hall of Court (Hard)[]

This map is like Castle Armory, as you have a clear vision. But you'll have to fend off these annoying Wyverns yourself and watch out for the Elf Warriors. Done at LvL 46, LvL 40 should be enough.
1st Wave : Build your 1st line of gas.
2nd Wave : Build your 2nd line of gas, build 1st line of fire and explosive.
3rd Wave : Build your 2nd line of fire and explosive. Begin your upgrades. Priority : More enemies at the doors in front of your trap = Higher priority for this trap.
4th Wave : Continue your upgrades.
5th Wave : Same. Be careful, a 30k HP Ogre will appear from the east of the map. Piercing Shots and normal shots should be enough.
The Throne Room (Hard)[]

This one will be harder to manage, but the boss will be a cakewalk. Done at LvL 48. In the later waves, manage your traps, as you'll need them "alive" for the boss wave.
1st Wave : Build gas everywhere.
2nd Wave : Build explosive and fire. If you can't build them all on the same build phase, just give a priority to the bigger waves of enemies.
3rd Wave : Finish your defense building if it wasn't done already, and begin upgrades. Same priority system as the previous levels.
4th Wave : 2 Ogres will come FROM BOTH SIDES, AT THE SAME TIME, WHILE WYVERNS WILL DIRECTLY FLY TO YOUR CRYSTAL! Continue your upgrades, but keep some mana to fend off this wave. Oh, and watch out for the elf warriors, of course.
5th Wave : 2 Ogres + Wyverns too! Continue your upgrades, and repair all the traps you see DURING THE WAVE when you're in a downtime to be more efficient during the boss wave. Watch out for the elf warriors.
BOSS - Goblin Mech : This mechanical monstrosity will be easier than the Demon Lord, as it can only move in the lower part of the level and his attacks are quite predictable...He has ~115k HP, so a full MP Huntress can bring him down pretty quickly with normal shots and Piercing Shots.
Abilities :

- Can fire several homing rockets. Keep moving, jump behind covers (pillars are very useful in this case) until you're safe. This ability opens his weak point.

- If you're at melee range, will sweep his surroundings with his blades. VERY DANGEROUS, KEEP YOUR DISTANCES!

Strategy :

To bring that thing down, you should respect these advices :

1) Keep your distances. Really. His sweep can burn a good part of your health.

2) Try to stick not too far of obstacles, so the homing rockets won't hurt you.

3) Hitting his weak point (His back, when the door is open) is a plus, but don't bother with that if you have to fend off some enemies while fighting the boss.
Royal Gardens (Hard)[]

Easy, provided you watch out for these atrocious wyverns and the occasionnal enemy your traps wouldn't kill. Done at LvL 51, can be done around LvL 40.
1st Wave : Build your 1st line gas and explosive.
2nd Wave : Build your 1st line fire. Begin upgrades.
3rd Wave : Continue your upgrades.
4th Wave : Same. You should be at LvL 2 for every fire and explosive trap.
5th Wave : Build a second line of gas+explosive+fire.
The Ramparts (Hard)[]

Done at LvL 53. You can do it around LvL 40 with the right gear/spec and a bit of reflex. MANY wyverns there, you'll mostly stick near your crystals to eliminate them quickly.
1st Wave : Build your first line of explosive. Build both lines of gas.
2nd Wave : Build your first line of fire. Complete your second line with explosive and fire ASAP.
3rd Wave : All your traps are placed, upgrade! (priority on the 1st line)
4th Wave : Same. Watch out for the ogre. You should stay above him, to fend off the wyverns.
5th Wave : Same. Watch out for the ogre. You should stay above him, to fend off the wyverns.
Endless Spires (Hard)[]

Done at LvL 55. This one introduces the REAL enemies during the last waves : Red sorcerers, a 80k HP Ogre, red Ogres, red Wyverns...You shouldn't try this level until you're LvL 50 with a good weapon and lots of points in Hero damage / Piercing Shot. 40+ in Hero Speed (from gear + Hero points) is a plus, as the map is SOOOOO HUGE!
1st Wave : Put down your 1st and 2nd line gas.
2nd Wave : Put down your 1st line fire and explosive. Upgrade them at LvL1 ASAP.
3rd Wave : Build your 2nd line explosive. Upgrade them at LvL1 ASAP.
4th Wave : Now, build your 3rd line of explosives! Upgrade them at LvL1. There's a reason behind this 3rd line : The REAL enemies come during this wave, and your LvL1 traps won't be enough. Why I wouldn't upgrade to LvL2 my traps instead? Well, there's too many traps to manage to upgrade all of them to LvL2. LvL1 Explosive will be cheaper and will fill the last defense units.
5th Wave : Keep your MP. Only repair your traps. A 80k HP Ogre appears, so be prepared to focus it down as soon as he comes in your line of sight. Be careful of the red sorcerers, as they have about 5k HP and spawn 1,4k HP skeletons...And they hit hard. Really hard.
The Summit (Hard)[]
Sorry guys, it's IMPOSSIBLE. And I've tried it around LvL 57.
The North crystal is manageable. But the two crystals at the south will suffer attacks from the wyverns and THE OGRES! The last wave will kill you if not the waves during the boss. 2 Ogres AT THE SAME TIME + 20 wyverns + enemies EVERYWHERE = Outnumbered. I managed to upgrade almost all my traps to LvL 2. But this wasn't enough... :p
There were 3 lines of defense :
- 1st line : Fire + explosive + gas.
- 2nd line : Fire + explosive + gas.
- 3rd line : explosive + gas.
If someone can solo it on Hard, please contact me on this page.
Anyway, if you manage to pass this last wave...
BOSS - Ancient Dragon :
This badass dragon will roast you if you're too slow to avoid his abilities... :

- The boss will cast fireballs towards you. Like the Demon Lord, just avoid it by standing still until he throw a fireball at you.

- When he's landed on a side of the map, he will at some point take a deep breath. GO AWAY! He'll spit a stream of fiery liquid during several seconds! He'll usually take off after this ability.

To bring him down :

1) See the ballistaes around the map? Use them when the boss is close to one. Doing this will inflict some damage and make him land on a side of the map. THIS IS THE ONLY WAY TO HURT HIM

2) Just burst him while avoiding his abilities, rince & repeat until he's dead!
BONUS : Glitterhelm Caverns (Hard)[]
Could probably be solo'd with a good awareness around LvL 55-60.
Build[]
My favorite for this situation is the trap build.
- Spend a lot of points in Trap health (less maintaining, less MP/repair, allowing you to upgrade/use skills with ease) until 35-40 points.
- Spend some points on Trap Radius (20-25 should be fine)...
- Then, either spend points in your Hero Damage (and a few in Hero Health, like 5-10), or go on with your traps.
This build heavily rely on your capacity to evade enemy attacks, because you will be very squishy (almost no points in Hero Health until ~LvL15). Delay this build by spending some points in Hero Health if you feel you're too weak or if you try Insane runs.
Multi Play
If you have some friends, a Huntress can be a valuable member of the team!
NOTE : Remember, you can set traps under towers/blockades!
Build
3 builds can be used in multi play...
DPS build[]
This build relies on your capacity to do insane amounts of damage to give a quick burst when a side have some difficulties to deal with a wave. Also very useful versus bosses and mini-bosses. There's one drawback, as you'll have weak traps (but your mates have more DU to spend!).
Just spend a lot of ponts in Hero Damage and Piercing Shot, with a bit of Hero Health.
Trap build[]
This build is like the Solo Trap build : All in the Trap health/radius, a bit in Hero health. Very powerful with a Tower built Squire/Apprentice! But be careful on these big enemies, you don't have enough DPS to bring them down quickly.
Hybrid build[]
This build mixes both sides. It can be nice if you are in the later stages of the game (after LvL 25-30, when you're almost maxed in your DPS/trap build), but it will be useless during your early career.
Combining your forces
A good Huntress will not necessarly kill loads of enemies. Be useful to your team!
Playing with a Huntress
You can have 2 Huntresses in your group, provided one focuses on setting traps and the other repair/boost them. Don't take 2 Trap build. Trap + DPS or DPS + DPS (or Hybrid + DPS, if there's a tower Squire/Apprentice).
Playing with a Squire
If the pants-less, mighty Squire is in your group, plan accordingly.
- Set fire traps if he deploys spike blockades. Explosive traps can also be used!
- Set gas traps if he deploys slice n' dice blockades. Packing the enemies will greatly improve efficiency! Gas traps can also be used with ballistaes or bowling towers.
If your Squire is going for a Hero Build, help him with a gas trap (Much easier to hit someone when he can't defend himself, right?)
Don't bother with traps if he's setting bumpers...
Playing with an Apprentice
Blockades or not, if he's building towers, just build some gas traps. If this apprentice is going for a Hero build, help him with some gas traps too (Enemies aren't attacking? FREE AE DAMAGE!)
Playing with a Monk
The Monk's auras are awesome, but they have some common points with your traps.
- If he ensnares a zone, don't bother with gas traps.
- Anyway, build fire traps, if possible under his own auras for maximum damage (and he'll save some uses on his auras...)